You can download PowerBot/RsBot cilent Here.
Combat. PowerBot
TFighterEE - The Original TFighter but with ENHANCEMEN
Features:
From The Original TFighter:
Ability to attack based on ID or names or a combination of both
Quick - built for speed!
Eats all food
Ability to only attack within a radius
Ability to utilize multi-combat areas
Easy to use GUI - saves last setup!
Nice and organized paint
B2P support (Bones to Peaches: Loot bones and have B2P tablets in your inventory)
You set the mouse speed
Uses model clicking - no other script does this that I'm aware of (for NPCs, that is)
Enhancements:
Ability to bury all kinds of bones and ashes
Ability to drink potions
Ability to cast Bones To Bananas
Ability to use High and Low Alchemy
Ability to use Special Attacks
Themed/ New GUI
Fixed continue error
Added autoupdater
New Paint
Multithreading
Option to disable Special Attacks
Full Prayer Potion Support
Automatic banking (Experimental)
Option to only pick up loot from a monster you kill
Arrow Equipping
Explorers Ring energy recharging
Expanded anti ban
basic bunyip summoning
powerbot DDoS protection
Automatic Room Generation
~~<White Bear AIO Fighter>~~ [Fast, User Friendly and Feature-Packed!]
Latest Version: V0.994 (Beta)
Download
Festures:
Flawless and Fast!
Very Stable; can run for days
Can choose to logout when skill reaches a certain level
Supports low and high alchemy
Supports Bones to Peaches (both tab and spell)
Supports maging and ranging
Supports burying bones and item taking
Supports banking (also support ladders, ropes, doors, teleport tabs)
Select if monster or items are prioritized
Excellent Antiban
Paint Setup
.ini GUI Settings file (5 save slots)
<<!!~~ Giant Spider Fuser ~~!!>> << ANTI-BAN >> << FLAWLESS >>
Current Version : v 2.6 [ Last Updated : 22 August 2011 ]
Features:
Banking ( Edgeville + Varrock )
Range Support
Eating (Custom Food ID or Food List)
Two Locations Supported ( The main room + the small room )
GUI Options
Potions Support
Teleport Support ( Varrock teleport runes + Varrock teleport TAB )
Awesome Anti-Ban ( 24 different types and cases )
Custom Mouse Speed in GUI
FuserScripts Mouse
Instructions:
Disable the Stronghold of Security Danger Warnings from Doomslayer in Lumbridge OR simply select Don't Show this Again on warning Message
Start at Edgeville Bank OR Varrock Bank ( Depends on What you selected in GUI )
Keep the Teleport Runes OR Teleport Tab in inventory ( If selected in GUI )
The selected food should be in Bank ( Keeping Huge amount is Recommended to keep it Run for long time )
Mining and Smithing. PowerBot
~~<White Bear Essence Miner>~~ [Fast and Flawless!]
Latest Version: V7.22
FEATURES:
Varrock and Yanille is FLAWLESS!
VERY Stable, can run for days!
Supports all pickaxes
Excellent Door Checking
It does not get stuck anywhere!
Very Informative and Interactive Paint, where some settings can be changed during runtime
Excellent Antiban
Adjustable Mouse Speed
Can choose to Rest at Bank (sitting down)
Simple GUI
.ini GUI Settings file
New Antiban percentages every run
Instructions:
- Download the .java file from my site (link below)
- Copy them into Document\RSBot\Scripts\Source
- Recompile
- Have fun botting!
- Having problems? Use the Ready-to-Use .jar file
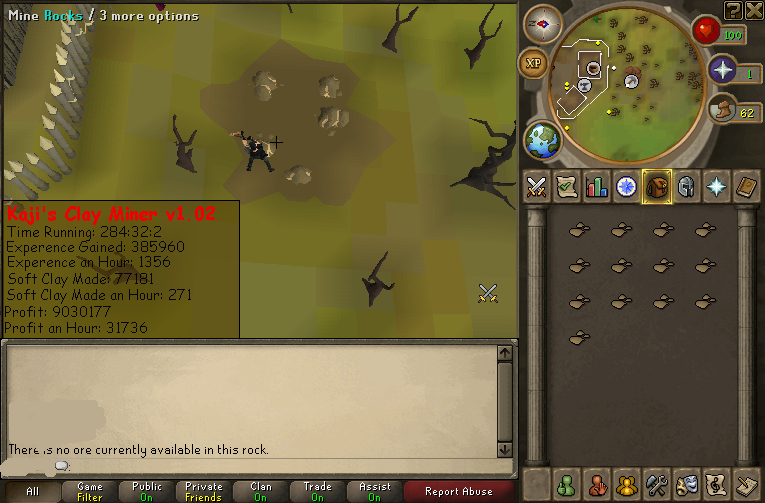
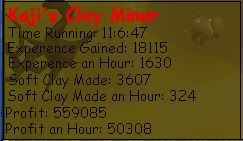
~Kaji's Clay Miner/Softener~ Barb Village/Edge
Version 1.05
This Script will mine the clay south of barb village,
then turn it into soft clay before going back
to Edgville bank to bank it all.
Anti-Ban
then turn it into soft clay before going back
to Edgville bank to bank it all.
Anti-Ban
Just start anywhere between Edgville and the Barb Village
with a pickaxe.
with a pickaxe.
MultiMiner--Mines at many mining spots--Fast & Flawless--ALWAYS banks--
Version 2.2
Features:
Always banks perfectly.
Great AntiBan.
Great and helpfully Paint.
Supports many mining spots.
Cool GUI.
Works on 2.40-2.50+
Precompiled Available.
Flawless.
Locations:
Mining Guild - Coal - Banks in Falador
Draynor village - Clay - Banks in Draynor Village
Ardougne - Coal _Iron - Banks in Ardougne
Yanille - Iron - Banks in Yanille
Barbarian Village - Coal_Tin_Clay - Banks in Edgeville
Varrock West - Clay_Iron_Silver_Tin - Banks in the Varrock West bank
Al Kharid - Coal_Iron_Gold - Banks in the Al Kharid bank
World-Wide Miner 2
Current Version: 2.121 Last Updated: 11.05.2011
Currently, supported locations include:
Power-Mining
LRC Power-Mining
Al-Kharid (F2P)
Ardougne East (P2P)
Ardougne South (P2P)
Barbarian Village (F2P)
Dwarven Mine (F2P)
Karamja Volcano (P2P - Banks in TzHaar)
Khazard Battlefield (P2P)
Living Rock Caverns (P2P)
West Lumbridge Swamp (F2P)
Mining Guild (F2P)
North Draynor Village (F2P)
Rimmington (F2P)
Taverly (P2P - Requires 5 agility)
TzHaar Caves (P2P)
Varrock East (F2P)
Varrock West (F2P)
Yanille (P2P)
Power-Mining has some additional settings:
Rock-Check distance (useful for staying between 3 or 2 rocks)
M1D1 or Traditional drop mode
Other features:
Unlimited Ore selection for mining (Like KMiner) so you aren't limited to two or three types, like several competitors. To select multiple ores, hold control and click. To select a range of ores, hold shift and click.
Speedy finding and clicking
Rock Hovering
Rock Checking - Moves on if rock is stolen
LRC Supports new death screen and also deathwalks from fally and Lumbridge
Show/Hide Icon
>>>( Eros's MINING GUILD ) <<< [Fast, Flawless, & Effective]
Version 1.4
Features:
- Fast, Flawless, & Effective
- Custom Mouse
- Several Fail-safes
- Sexy Paint
- Supports Wielded & Carried Pickaxes.
- Multi Antiban
Instructions:
1. Download my script code.
2. Compile as usual.
3. Select InvaderZim's Mining Guild Invader and run!
4. Please start with a pickaxe, and enjoy.
EliteSmither
Version 1.05
Proggies/Screenshots
Features:
- Smiths anything at Varrock west anvil
- Very fast, up to 220k xp/h with adamant platebodies
- Humanlike
- Threaded camera control
- Supports golden & normal hammer
- Informative, hideable paint
- Auto-updater
Fishing and Cooking
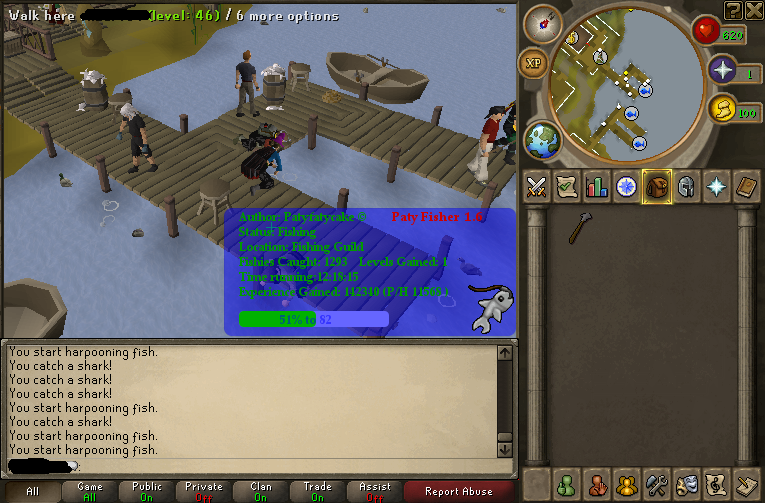
★★Patyfatycakes Fisher★★ - Global AIO Fish
Version 4.2
Features:
- Free
- Simple paint
- Antiban
- Simple GUILocations:
Barbarian Village
Draynor Village
Catherby
Fishing Guild
Karamja(Banking/Stiles/Ring banking)
Living Rock Caverns(Will be created in future)
Lumbridge
Ottos - Confirmed working by beast6
Piscarious
Shilo Village(Not finished)
- Free
- Simple paint
- Antiban
- Simple GUILocations:
Barbarian Village
Draynor Village
Catherby
Fishing Guild
Karamja(Banking/Stiles/Ring banking)
Living Rock Caverns(Will be created in future)
Lumbridge
Ottos - Confirmed working by beast6
Piscarious
Shilo Village(Not finished)
Modes:
Banking
Fish 1 Drop 1(F1D1)
Powerfishing
Stiles(Karamja only)
Banking
Fish 1 Drop 1(F1D1)
Powerfishing
Stiles(Karamja only)
EpicBot.
You can download EpicBot Here. EpicBot is not open cilent like than PowerBot/RsBot so you can not add their own script. But it is good bot because if RuneScape be updated EpicBot coming up fastest. EpicBot have these scripts for free:
- Agility
- Chopper
- Cooker
- Fighter
- Fisher
- Flaxer
- Flax Spinner
- Smelter
- Fletcher
- Miner
- Planker
- Thiever
- Tanner
- RuneCrafter
RiD or Robotz in Disguise.
Rid is Colorbot so it take control your computer pointer/mouce/cursor. If you do not download and use VirtualBox you dont do anything that time on your computer.
1 - Downloading
Click here to download RiD.
2 - Extracting & Running
Right click on the file and extract with winRAR (if you don't already have it, get winRAR Here)

Double-click RiD.jar (highlighted above) to run the bot!
3 - Computer Settings
Windows 7 & Vista Users: You MUST set Windows Theme to classic!

Non-Windows users: You must setup a Virtual Machine or dual boot, with a copy of Windows to run the bot. Get everything you need to do that here.
4 - RuneScape Settings
Select Fixed Screen, Min, Software Mode, Brightest. You must also have game chat: All and avoid very busy clan chats during botting.

You need to have RuneScape open in the background when you start the bot!
5 - Minimizing (optional)
Although you can't minimize the bot directly, you can minimize your windows session using a Virtual Machine.
Now Version 2.00!
To update your VM with new bots download and run this file inside the VM. You can run it on your main pc as well!
Download VirtualMachine - All In One
1. First Things First(Requirements)
2. About the Operating System
3. Installing The VirtualBox
4. Downloading and Installing the copy of Windows
5. Finishing Up(Optional)nges
Wot's... Uh The Deal?
Well the deal is that I spent a while going through and crushing down a XP install.
It is a 307Mb ISO. In comparison to the 585Mb install disk that Windows ships with, that is a lot of junk removed!
278Mb to be exact .
.
I have removed everything that is unnecessary for botting, and slipstreamed in Service Pack 3, Every Windows Update expect for 10 or so of them, Java, WinRar, Flash, and RuneScape.
To update your VM with new bots download and run this file inside the VM. You can run it on your main pc as well!
Download VirtualMachine - All In One
1. First Things First(Requirements)
2. About the Operating System
3. Installing The VirtualBox
4. Downloading and Installing the copy of Windows
5. Finishing Up(Optional)nges
Wot's... Uh The Deal?
Well the deal is that I spent a while going through and crushing down a XP install.
It is a 307Mb ISO. In comparison to the 585Mb install disk that Windows ships with, that is a lot of junk removed!
278Mb to be exact
. I have removed everything that is unnecessary for botting, and slipstreamed in Service Pack 3, Every Windows Update expect for 10 or so of them, Java, WinRar, Flash, and RuneScape.
NOTE: DO NOT BURN THIS TO A CD AND PLACE IN YOUR COMPUTER. IT WILL WIPE YOUR HARD DISK AND CONTAINS NO DRIVERS.
1. First Things First(Requirements)
There is some minimum requirements to be able to run a Virtual Machine on your computer.
Please take in mind that a Dual-Core or above processor with an 64 Bit operating system is highly preferred.
You will also need a virtual machine installed. For this guide we will be using VirtualBox as it is free and works with all operating systems.
2. About the Operating System| Minimum Requirements | Recomended Requirements |
| (Athlon 64 / Pentium 4) 2GHz 1Gb Ram 16Mb Video Card Windows XP | (AMD Phenom / Intel i5) 2GHz 4Gb Ram 128Mb Video Card Windows Vista or 7 X64 |
Please take in mind that a Dual-Core or above processor with an 64 Bit operating system is highly preferred.
You will also need a virtual machine installed. For this guide we will be using VirtualBox as it is free and works with all operating systems.
Introducing: TinyBot! Your tiny streamlined Windows XP install designed just for botting!

| 1. It's English language and keyboard only. 2. All games and unneeded accessories are removed. 3. All drivers for non VM devices are removed. 4. There is very limited program functionality. (Office may not work, programs that rely on certian windows features may not function correctly) 5. Has TCP/IP max connection exploit. (Allows more then 10 connections at one, good for torrenting.) 6. Forces TCP/UDP packet priority of 1 (highest priority, must have compatible network) 7. Has the majority of windows updates installed. 8. Will always pass the Genuine Test. 9. Requires no interaction during inital install. 10. Has shortcuts on the desktop that launch the bot's in realtime priority. 11. Has Java, RuneScape, Flash, and all of RiD's current bots installed. 12. Has a 99% chance of failing if you try to install it on your pc. (Heed my warning at the top of the thread >.<) 13. Used only 78mb of ram when Idling on my first install. 14. Has multi-processor support. 15. 278Mb of Windows junk removed. |
Here you will install the Virtual Machine. A Virtual Machine is a emulator, just like a NES or GameBoy emulator on your computer. In this case though, instead of emulating a NES's hardware, your emulating the hardware of a computer. This allows you to use the Virtual Machine just like you would a real computer.
To download VirtualBox go to VirtualBox and download the file for your operating system.
Now that you have the file downloaded you may install it by following the on screen prompts, watching the video(windows only), or reading the instructions below it.
If you have a hard time making out whats happening in the video, watch it in HD.
1. Open the installer.
2. Press the Next button to go past the welcome screen.
3. Agree to the license and press Next.
4. Next it will show you a list of features. Go ahead and press Next as we want the defaults installed.
5. The next screen will ask you if you want to create shortcuts. Go ahead a press Next.
6. This next screen is a warning informing you that you will be disconnected from this internet for a few seconds. This is ok, go ahead and press Next.
7. This screen tells you that it is ready to begin installing. Go ahead and press Next to begin the installation.
8. Wait patiently while it installs.
9. You'll notice that there may be pop up's asking you to verify the installation of drivers. Press install for these pop up's.
10. Tada, the installation is complete! Press Finish to launch VirtualBox for the next step.
4. Downloading and Installing the copy of WindowsTo download VirtualBox go to VirtualBox and download the file for your operating system.
Now that you have the file downloaded you may install it by following the on screen prompts, watching the video(windows only), or reading the instructions below it.
If you have a hard time making out whats happening in the video, watch it in HD.
1. Open the installer.
2. Press the Next button to go past the welcome screen.
3. Agree to the license and press Next.
4. Next it will show you a list of features. Go ahead and press Next as we want the defaults installed.
5. The next screen will ask you if you want to create shortcuts. Go ahead a press Next.
6. This next screen is a warning informing you that you will be disconnected from this internet for a few seconds. This is ok, go ahead and press Next.
7. This screen tells you that it is ready to begin installing. Go ahead and press Next to begin the installation.
8. Wait patiently while it installs.
9. You'll notice that there may be pop up's asking you to verify the installation of drivers. Press install for these pop up's.
10. Tada, the installation is complete! Press Finish to launch VirtualBox for the next step.
4.1 Downloading the copy of Windows
Single Core
Now that you have Installed VirtualBox you'll need a copy of Windows to install in it.
You have two choices on where to download the file.
If you prefer to download over megaupload, here is the link -
You have two choices on where to download the file.
If you prefer to download over megaupload, here is the link -
Download from Megaupload.
And for everyone who enjoys torrents, this is the link -
And for everyone who enjoys torrents, this is the link -
Download .torrent
You'll have to wait a while for the file to download, hopefully not too long though, your almost to the exciting part!
Ok! Now that you've downloaded the file we need to extract it. The file is a .ZIP file. This means we need a program to extract it, most likely you'll have WinRar installed so pay attention!
When you open up the file you downloaded, it contains a file named TinyBot.iso . You need to extract this file to a location that you remeber such as you 'C:\' drive or your 'Desktop'.

DO NOT BE FOOLED BY WinRar!!!!!
When you open the file you downloaded it may look like there is another WinRar file inside of it, THIS IS THE FILE YOU NEED, DO NOT OPEN IT. If you open it, you'll be inside the Windows CD and that will do you no good.
4.2 Installing the copy of WindowsYou'll have to wait a while for the file to download, hopefully not too long though, your almost to the exciting part!
Ok! Now that you've downloaded the file we need to extract it. The file is a .ZIP file. This means we need a program to extract it, most likely you'll have WinRar installed so pay attention!
When you open up the file you downloaded, it contains a file named TinyBot.iso . You need to extract this file to a location that you remeber such as you 'C:\' drive or your 'Desktop'.
When you open the file you downloaded it may look like there is another WinRar file inside of it, THIS IS THE FILE YOU NEED, DO NOT OPEN IT. If you open it, you'll be inside the Windows CD and that will do you no good.
So, now that you have extracted TinyBot.iso we will need to configure a virtual machine to install the copy of windows into.
Our Virtual Machine will have these settings depending which one you want. Note that once you choose the system type and install windows you may not be able to change without repeating this step onward.
Now you can go ahead and set up your Virtual Machine yourself or you can watch the either of the guides shown here.
Our Virtual Machine will have these settings depending which one you want. Note that once you choose the system type and install windows you may not be able to change without repeating this step onward.
| Single Core(Minimum) | Multi Core(Recomended) |
| 1 Processor 768Mb Ram 5Gb Disk 16Mb Video Memory No 3D Acceleration No USB No Serial Ports | 2 Or More Processors IO APIC Enabled PAE/NX Enabled 1024Mb Ram 5Gb Disk 64Mb Video Memory No 3D Acceleration No USB No Serial Ports |
Now you can go ahead and set up your Virtual Machine yourself or you can watch the either of the guides shown here.
Users who already have a Vitrual Machine created may begin by skipping to step 13.
If you have a hard time making out whats happening in the video, watch it in HD.
- Press New and then press the next button on the welcome screen.
- Next Enter the name you wish to use for this virtual machine and select Windows XP as your operating system, then press Next.
- Now type 768 in the box for memory. This sets your memory to 768Mb, press Next.
- It will ask you to create a new Virtual Hard Disk. Make sure Create new hard disk is checked and press next.
- Select Fixed-size storage and press Next.
- Make your hard drive size right around 5.00Gb and press Next.
- Press finish to create the Virtual Hard Disk.
- Now press Finish again to create the Virtual Machine.
- Now cick on the Settings icon at the top.
- Select Display and make sure that Enable 3D Acceleration is not checked. Make sure your Video Memory is set to 16Mb and Monitor Count: to 1.
- Select Serial Ports and make sure that the Serial Port is not enabled.
- Go to USB and un-check Enable USB Controller.
- Select Storage. Click on the Empty CD.
- Click on the CD with the down arrow next to it on the right hand side of your screen.

- Click the Add button on top.
- Browse to the location you extracted the download to.
- Open TinyBot.iso
- Press Select. Then press OK.
- Press the Start button at the top.
- Wait.
- Wait some more.
- Wait just a little longer.
- Close out of the RuneScape pop up.
- Authenticate your copy of Windows.
- Wait a bit more.
- Click the red X by the clock and adjust your resolution.
- Restart the virtual machine once it comes up to delete teporary files and complete installation.
- Your Done!
Ghost Mouse
Added 04.10.2011 Version 3.1
Download
Ghost Mouse to record your mouse moves and repeat them
ie you pick 28 iron and bank them Ghost Mouse do same way like you do.
Ei kommentteja:
Lähetä kommentti